
This Article will cover on how to edit recovery image.
Understanding
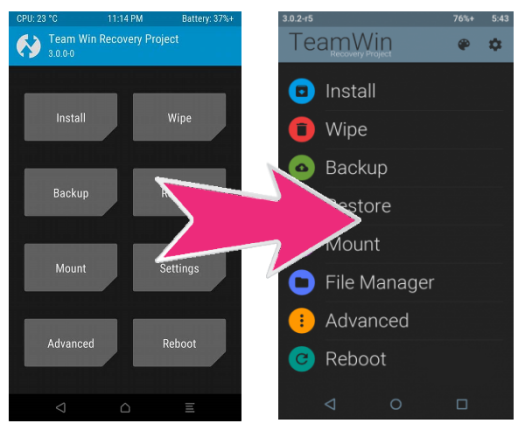
As of now, there are no modification patches available for stock recovery. But if you are modifying twrp recovery there is one thing you can do, that is making a materialized twrp image.
The patch was originally made by me, can be found in this tool. Due to a lot of attention on this tool, I decided to update it and add it to ADK. Now rather than using stock play theme there are many themes you can choose from.
Also, the option of adding themes will be automatically disabled if you are using a stock recovery in place of twrp recovery.
Working Through
- Adding Themes to TWRP
In your TWRP Project, Select Project > Add themes. A Dialog box will appear as shown.
From above you have to set some configurations as shown. I think I don’t have to explain them, all are human readable if you know them well. If you still don’t get them try reading this (this guide is for my previous batch tool, all options are same, the thing is I’ve explained in the better way over there).
If you want to change the theme, Select the combo box and choose your desired theme. You can also browse for the custom theme as shown.
A Small Tip: Selecting a custom theme won’t be difficult if you understand it. If you find any theme which is recovery flashable or you know the stuff that you rename it to ui.zip and copy it to the twrp folder. Yes, that kind of zips can be used as the custom theme. The main difference here is they are applied as temporary but ADK will inject the theme directly into the recovery image so that it will remain forever. Next time porting a materialized twrp won’t make any sense rather than injecting theme through ADK.

shit doesnt work
LikeLike
It works on several twrp with max resolution 1080p. Maybe your device is shit that doesn’t support this 🙂
LikeLike