
So here is basic theory explaining why we need this tool! Basically we all know about OTAs and also what is stock ROM. If you noticed mostly in every stock ROM there should a file named boot-verified.img or recovery-verfied.img along with boot and recovery image. WHY?
Well, verified images are those matching original signature of device which allows flashing of images even if bootloader are locked. This same concept is used in OTAs, basically they are OEM (signed) images that’s why they can be flashed.
But suppose we modify a boot image and try to flash the image in locked bootloader, it won’t work b’coz original signature are not matching. So referring to chainfire’s work of signing images which he calls AVB, I created this tool which does this task in simplier way.
Note: This method does not work all the time. PS: Even Magisk does this when you create a patch boot image within Manager app.
Working Through
- In ADK, select Tools > Boot Signer Tool.
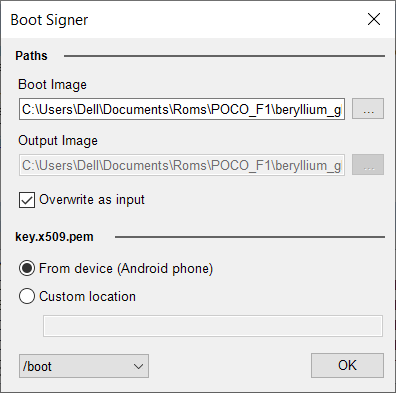
- Set your input boot image and out path.
- Now you need to browse for key.x509.pem (i.e your device signature file), usually they can be found within /etc/security/otacerts.zip. If you don’t have it or want to pull it out from device select the desired option.
- Now hit OK to start the process, ADK will notify you once it’s done. Now you can try flashing the image in locked boot loader.
